
Forms
Use forms to collect and analyze information from your website users. Sites provides you with two options to create custom forms with ease:
To access your form builder:
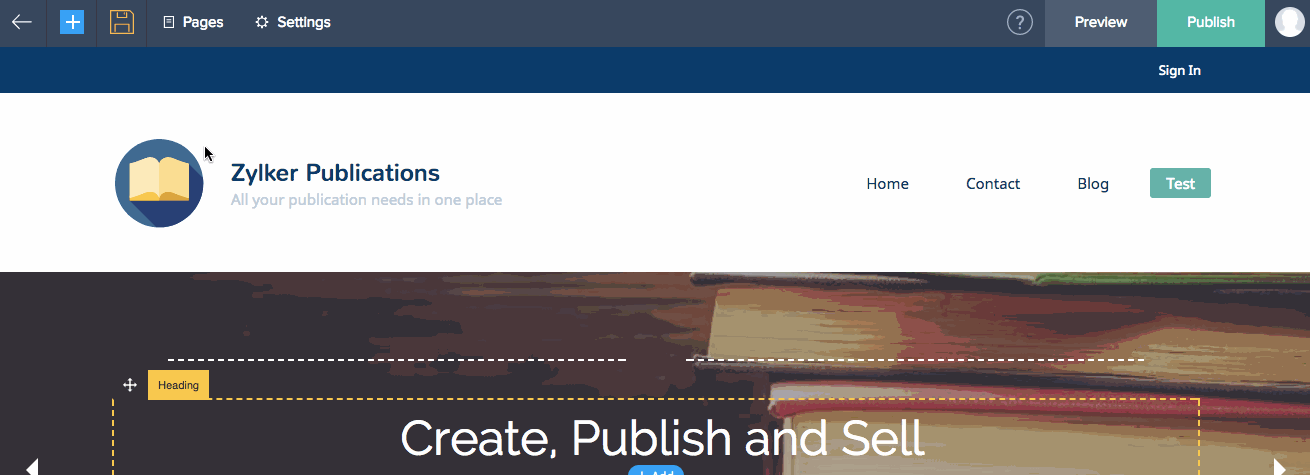
- Click the Add [
 ] icon in the top-right corner of your builder, then click Element.
 - Select Forms from the menu on the left.
CRM
Create forms on your Zoho CRM account to add your web forms to your website. Once the form is generated, you can add them to your site.
Under Form section look for Zoho CRM web forms widget, drag and drop it on your page.
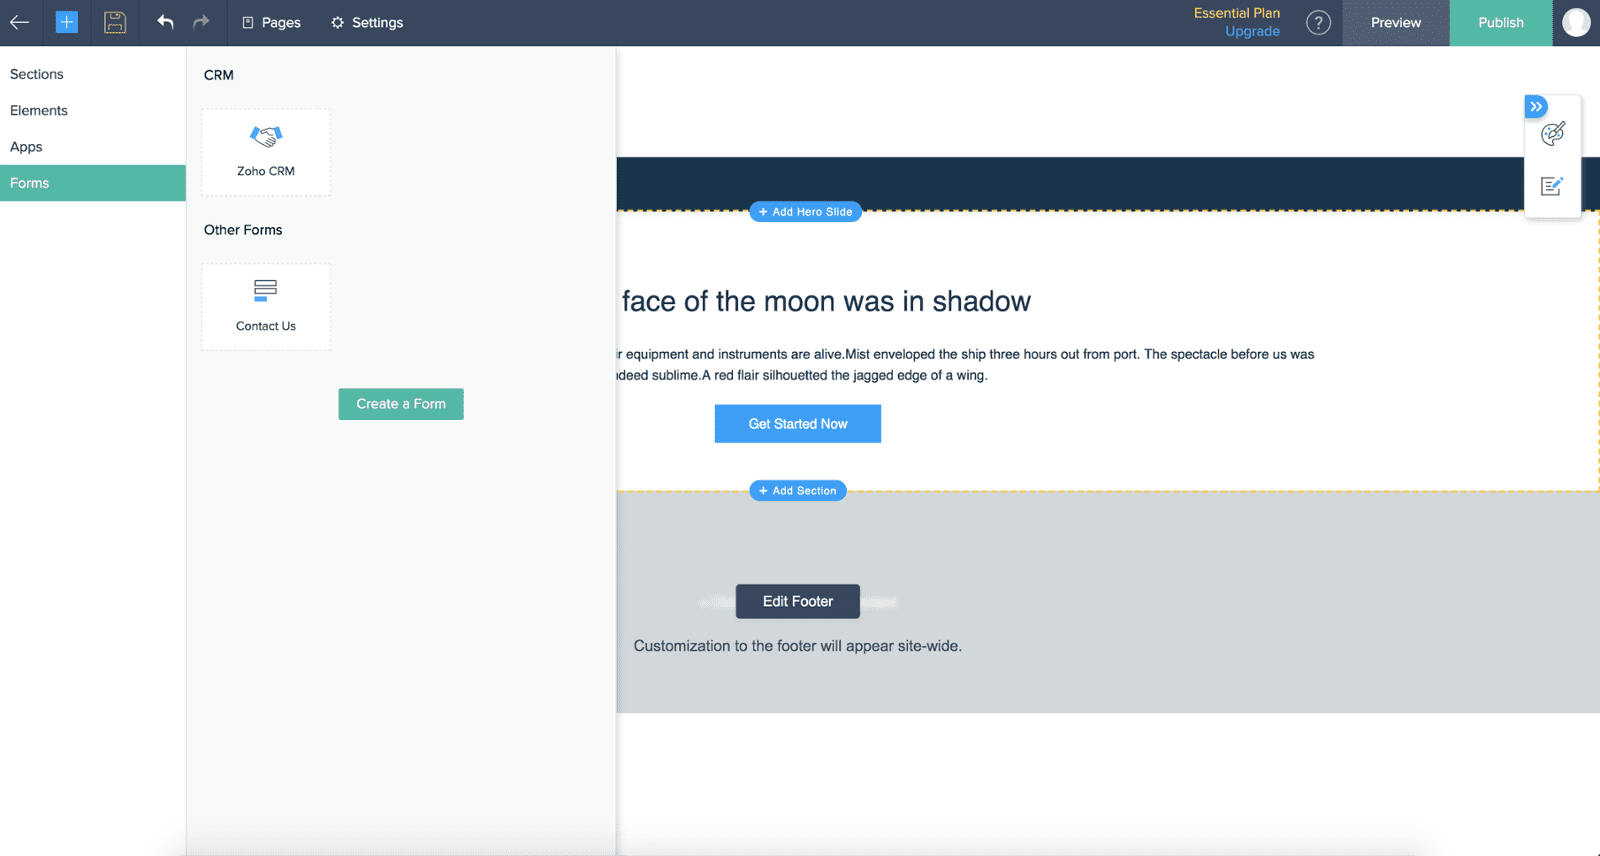
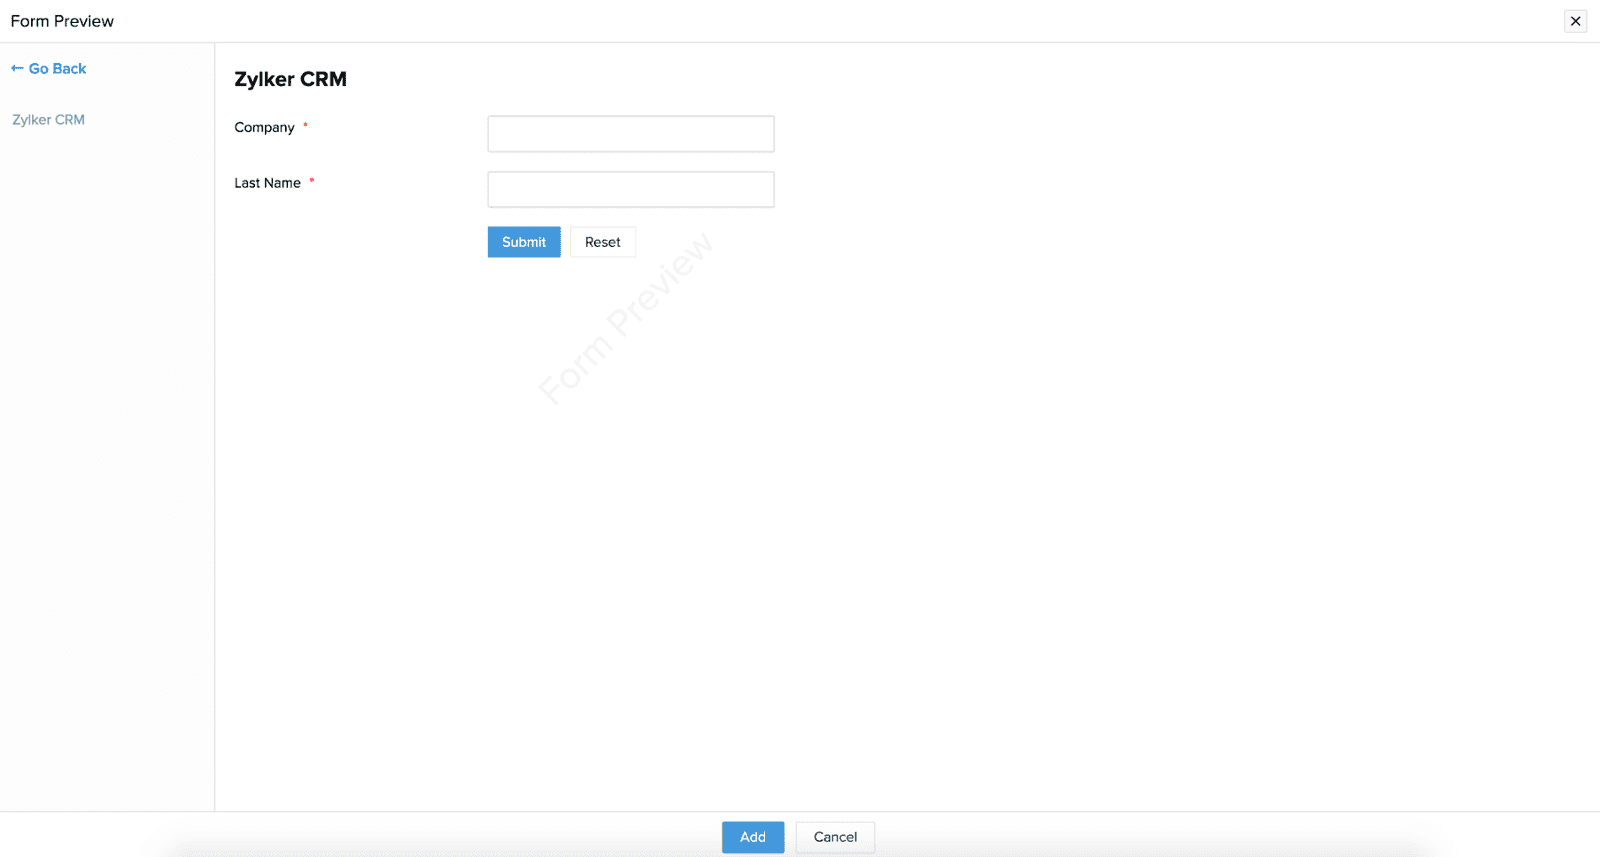
A window will open up, instructing you to select a form that you want to add to your site.
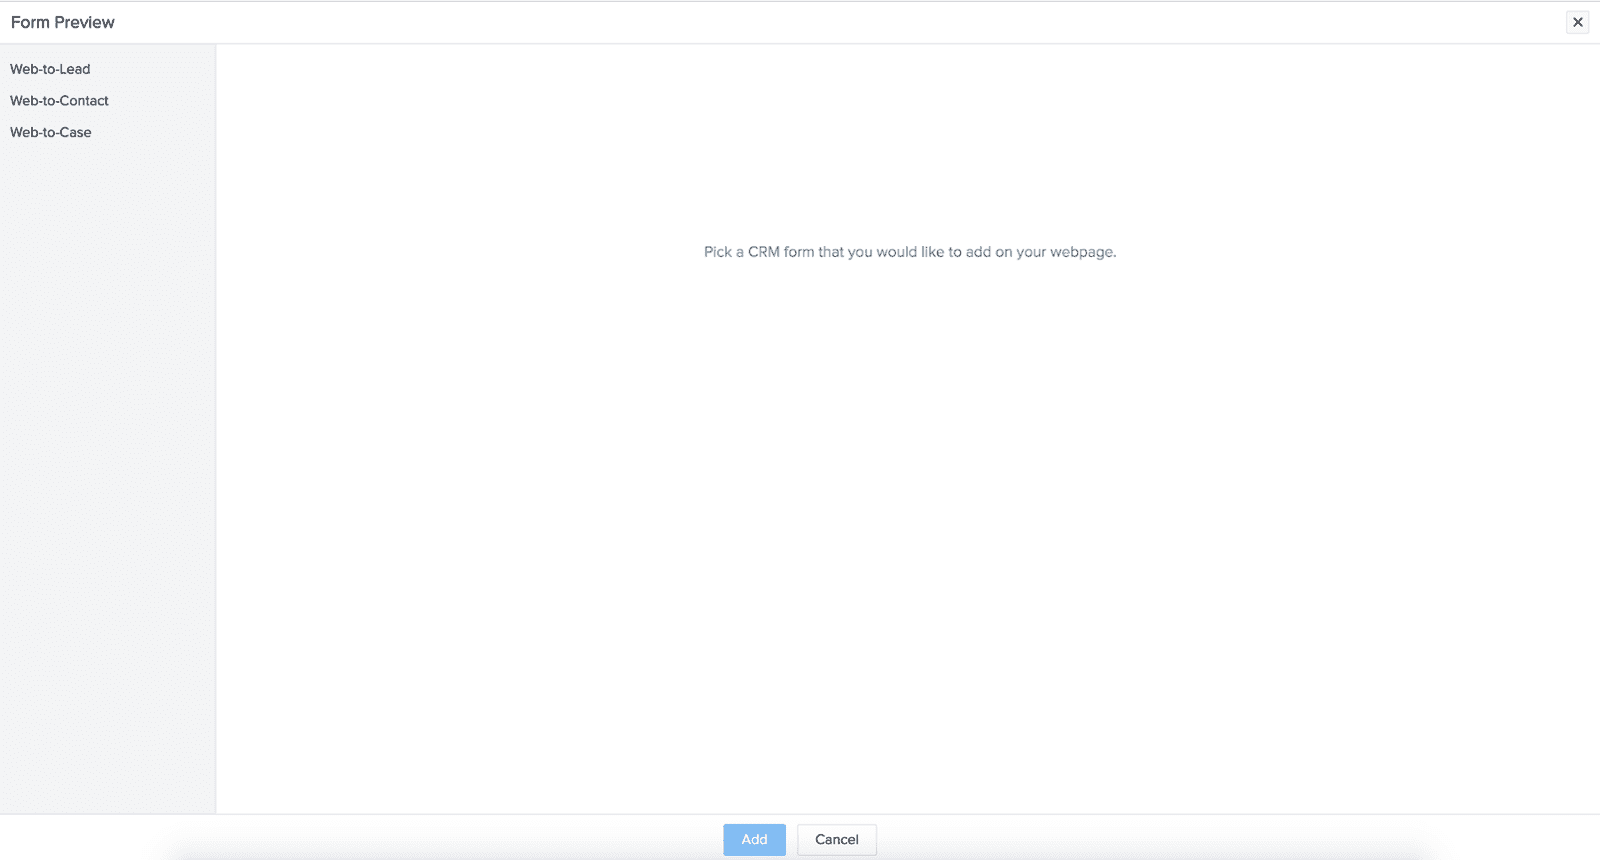
If you do not have any web forms on your CRM account, you can generate one. Here's how:
Generating web forms on Zoho CRM:
1. Access www.zoho.com/crm
2. Click on the Settings icon on the top right-hand side, then click Setup from the drop-down menu.
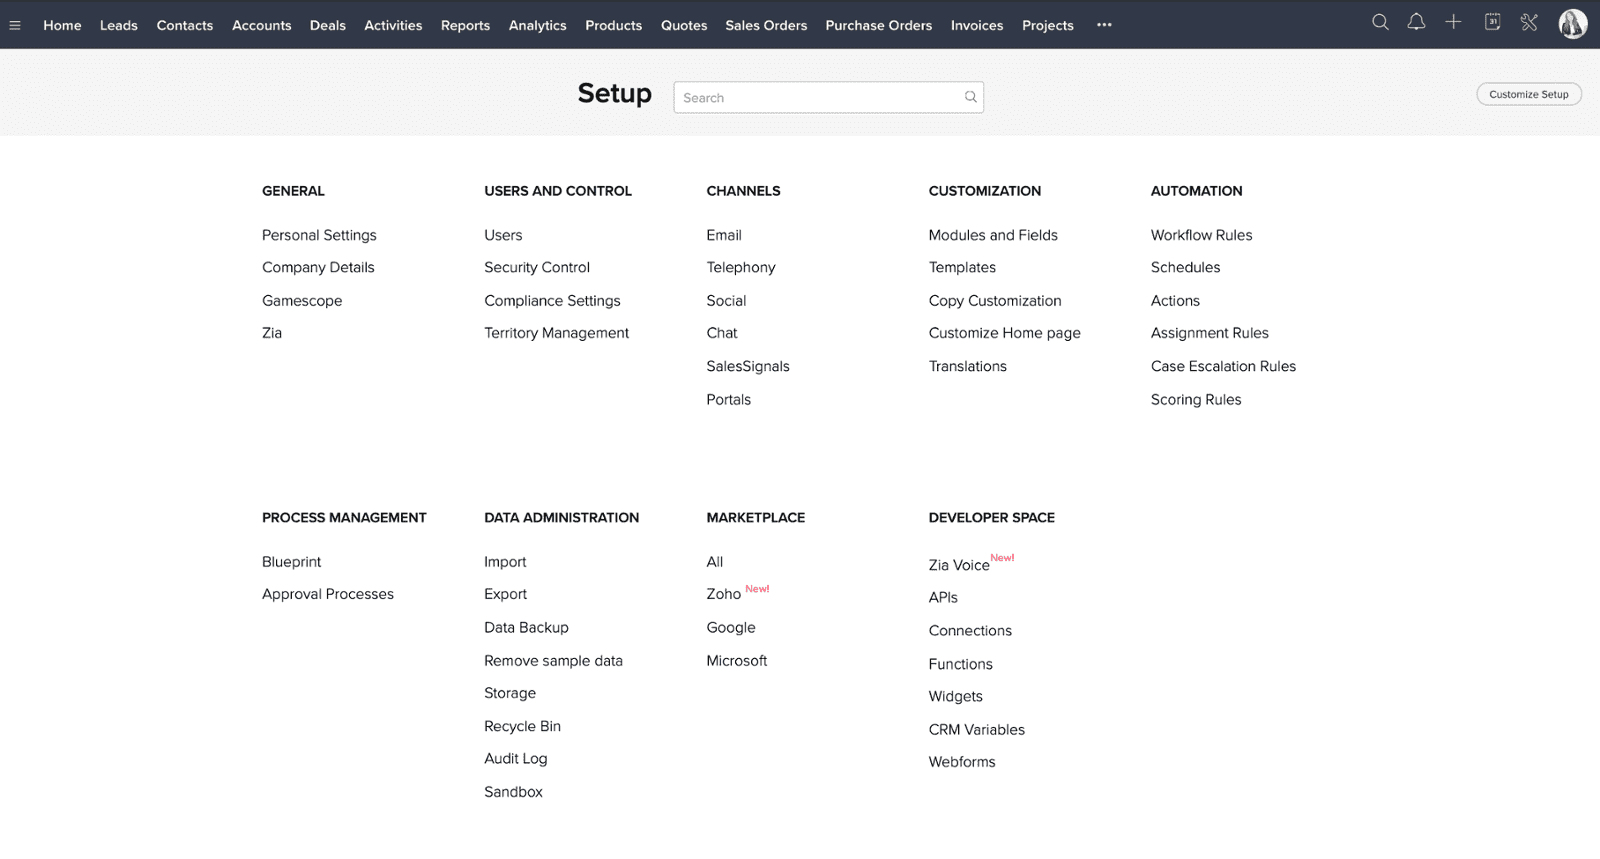
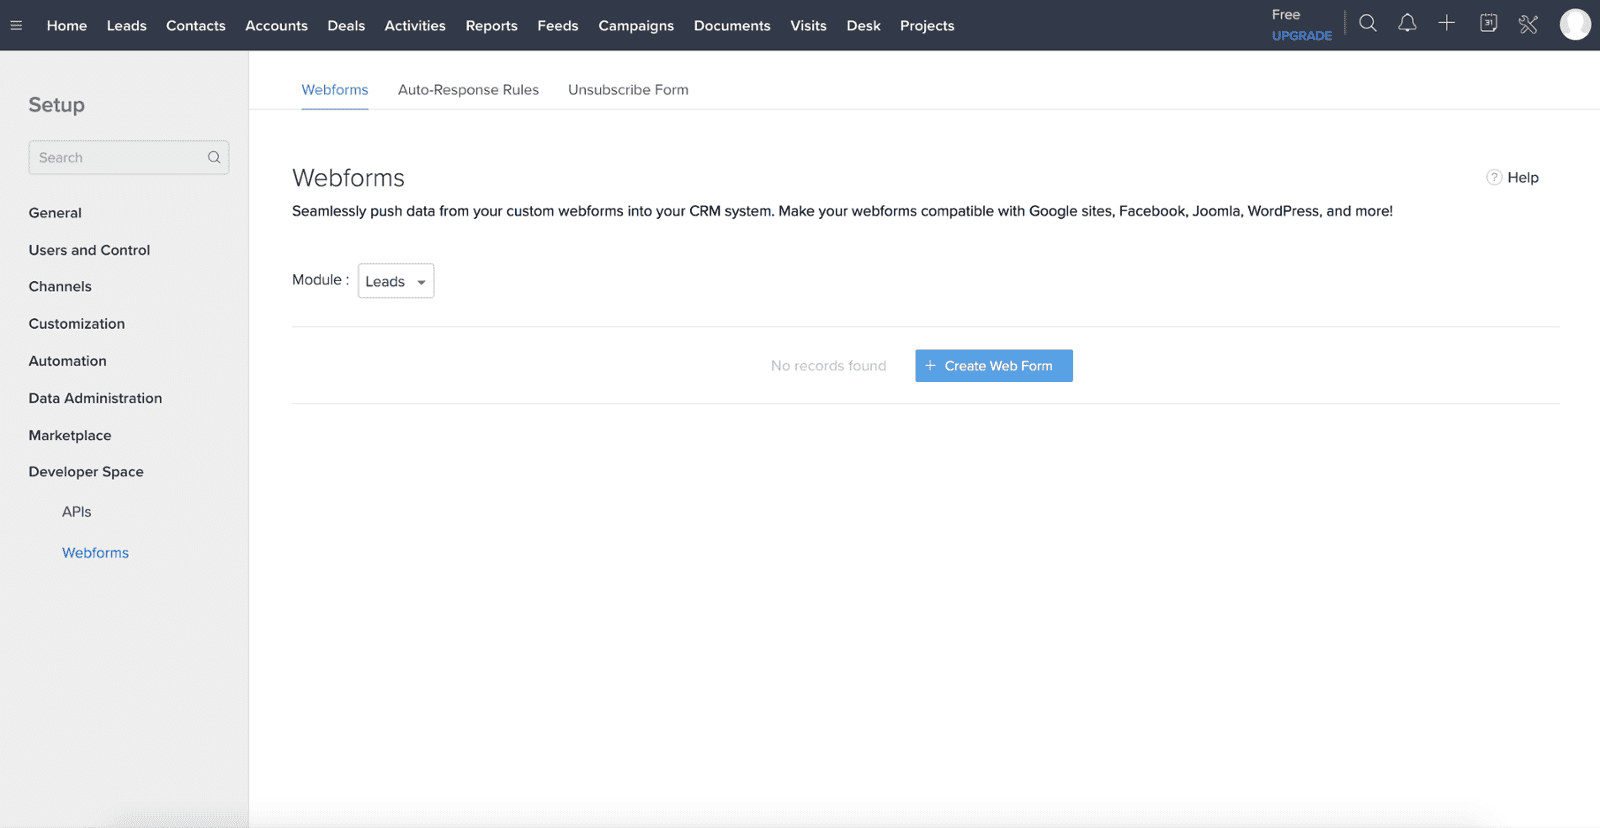
3. In the Setup section, click Webforms under Automation.
4. This would redirect you to the Webforms section from where you can create new CRM Web Forms.
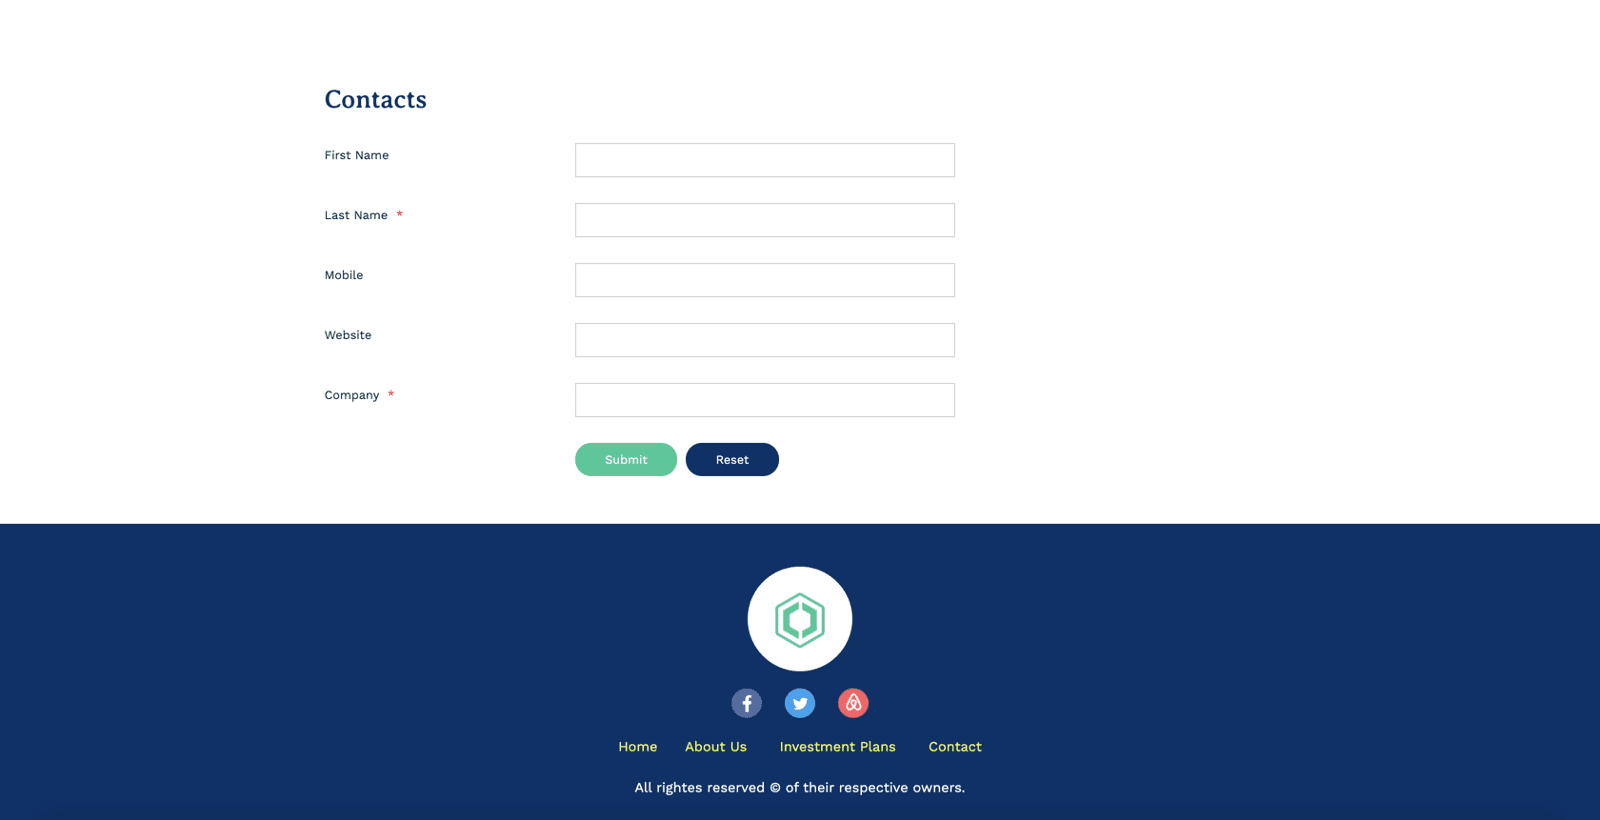
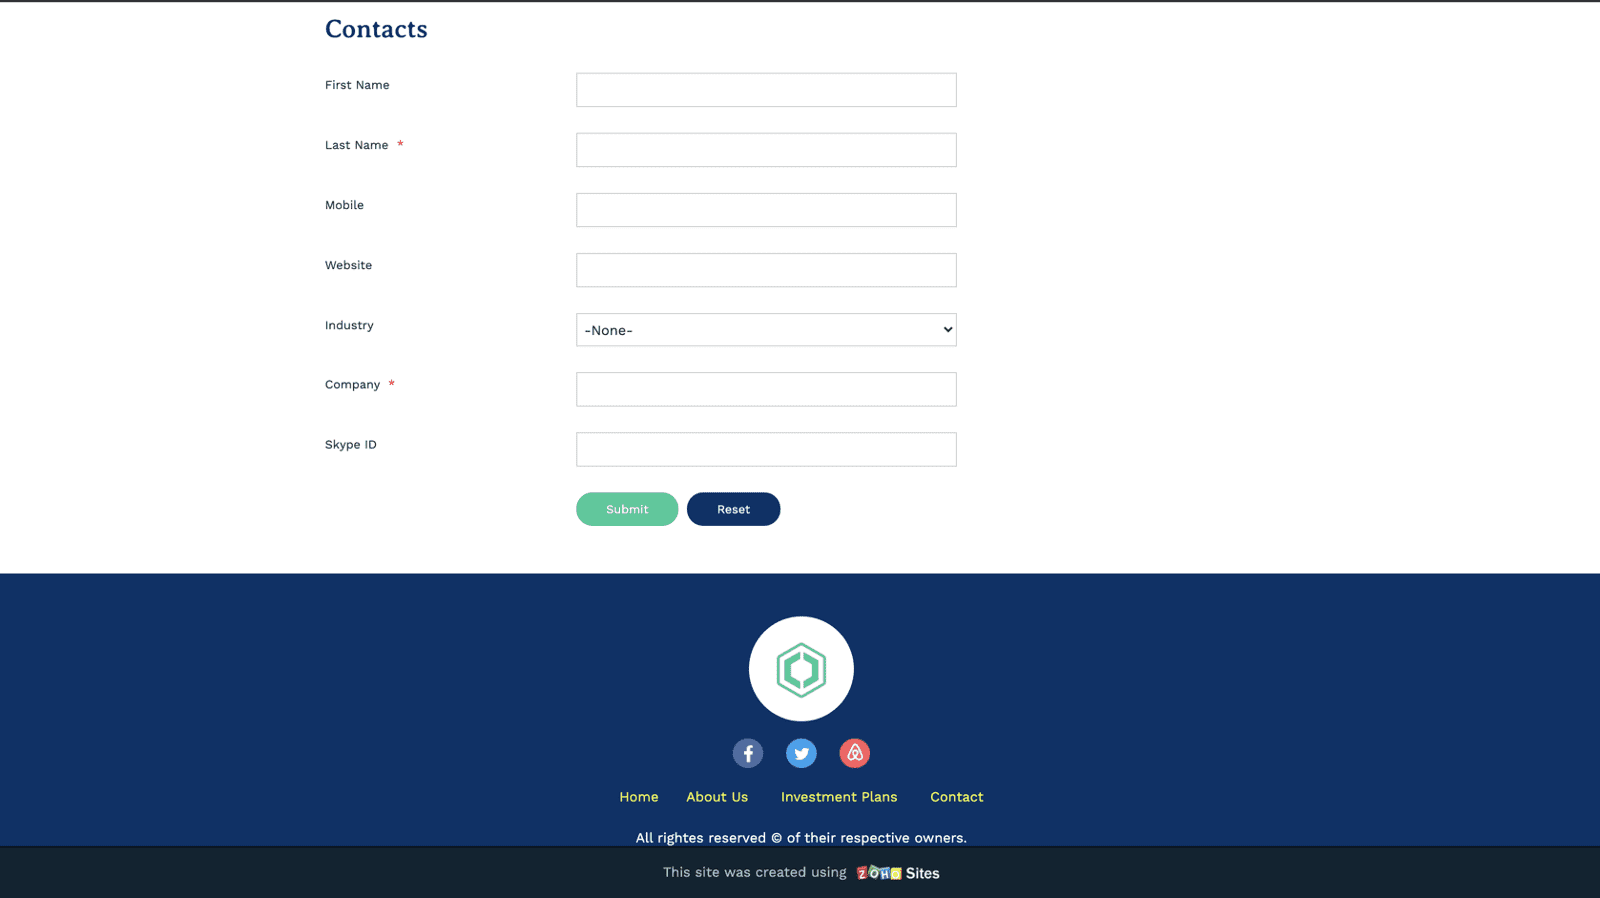
To generate web forms for Leads, Contacts, and Cases
1. Click Settings > Setup > Web Forms.
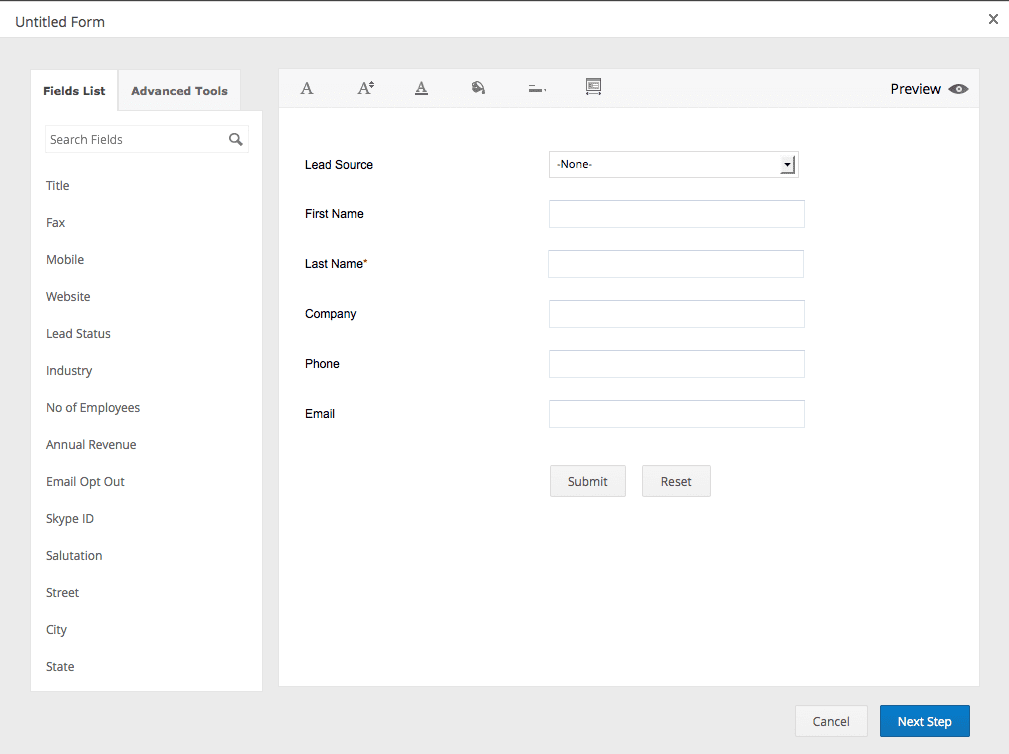
2. In the Web Forms page, choose Lead/Contact/Case tab and click Create New Form.
3. Drag and drop the required fields into your form and click Next Step.
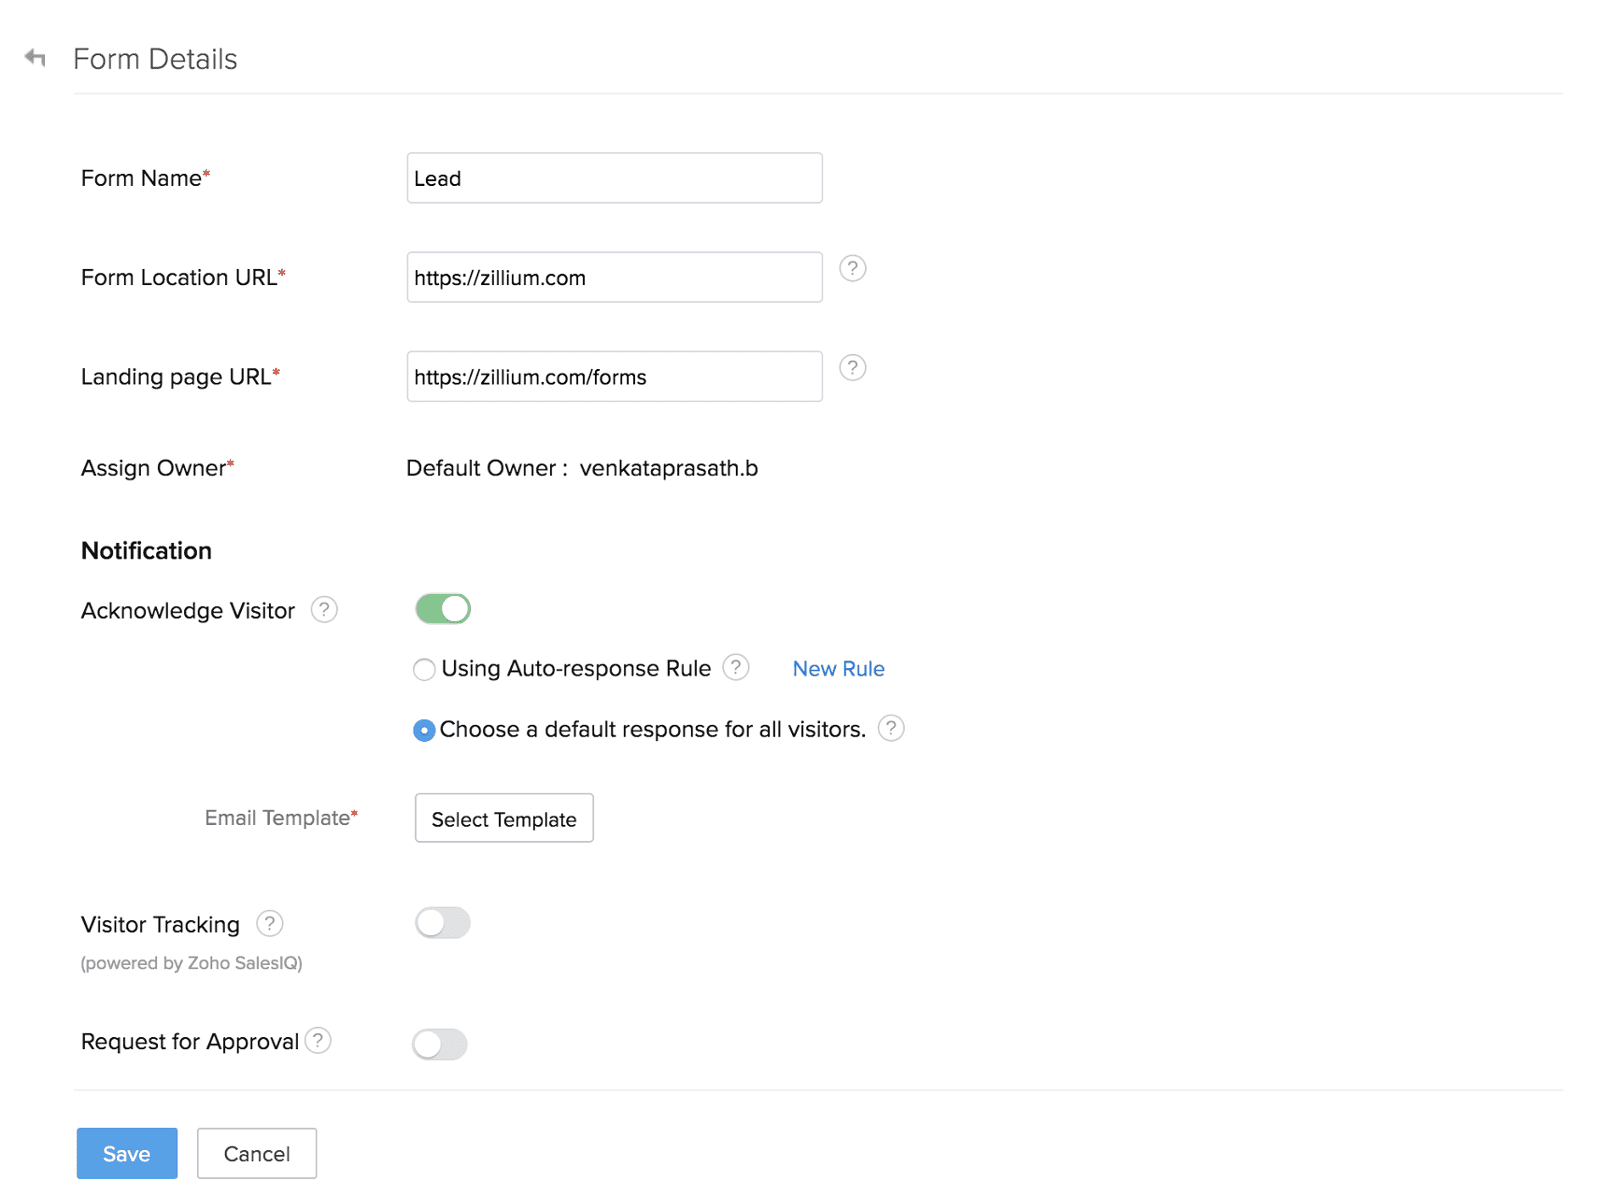
4. In the Form Details page, enter a Form Name (eg. Feedback form, Data form, etc.). Then, enter the URL of the web page to which the visitor needs to be redirected once the web form is submitted. Specify a valid Landing Page URL starting with "http://". This could be one of the page of your site.
Also, enter the URL of the website where the web form is to be hosted in the Domain Name box. It should start with "http://". This could be your primary domain name prefixed with http://. This prevents spams and allows only forms submitted through the particular domain to be captured as valid information.
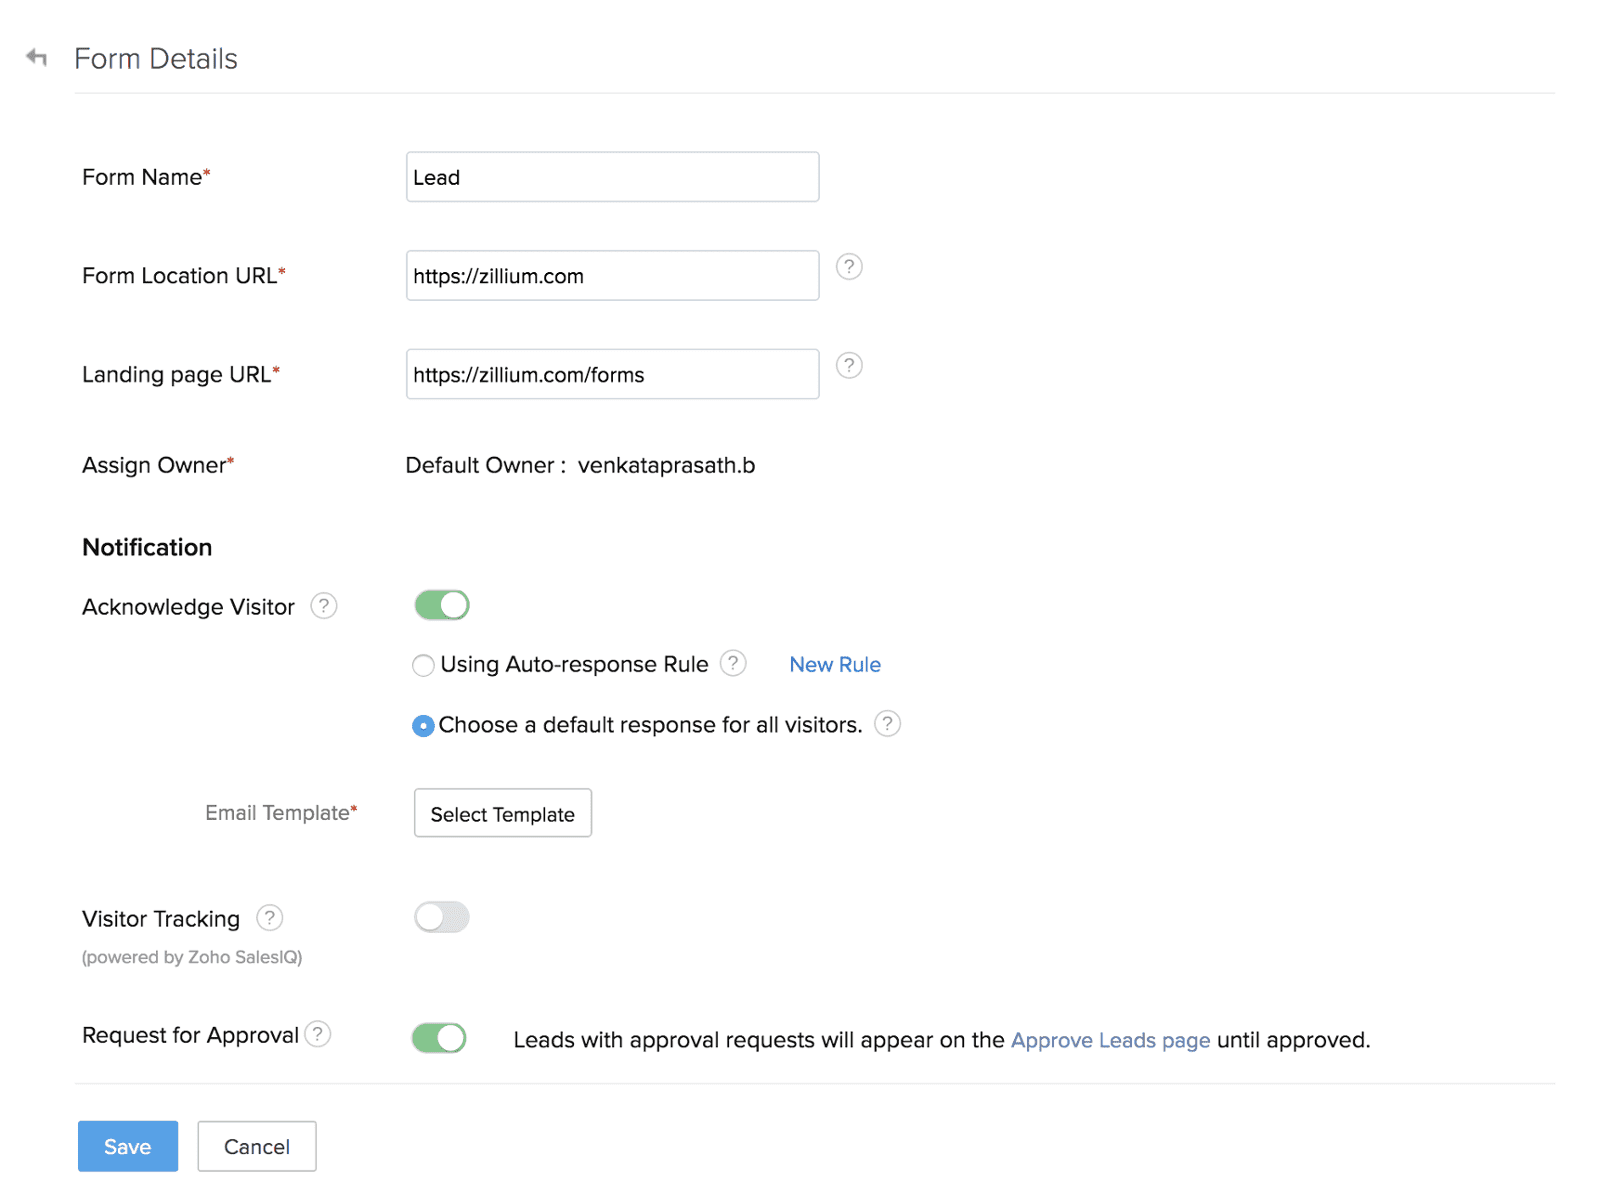
You can also set auto response rules for the CRM forms. Auto Response Rules allow you to specify criteria that picks the required email templates to be sent when a record is generated through web forms. You can have only one active Auto Response Rule for a module.
Email Notification:
1. Select an email template from the list.
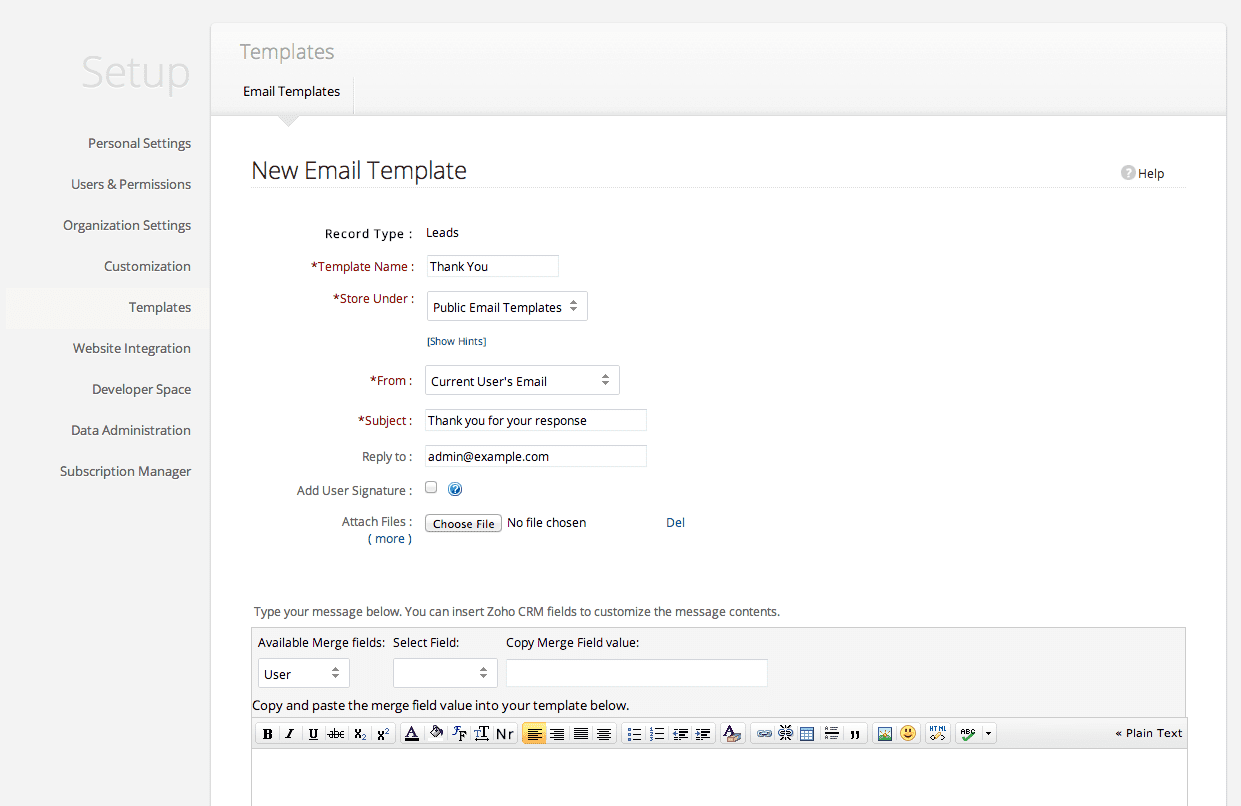
2. The template that you select will be used to send an auto-response email to the user who submits the form. When the details gathered through the web form does not satisfy the Auto Response Rule criteria, then the email template (acknowledgment email) selected while creating the web form will be sent.
3. Select the Notify Record Owner option to send an email to the owner, when a record is generated through your website.
Every time your website visitor enters information, the record is created in Zoho CRM. Next, the user will be redirected to the Landing Page URL. An email will be sent to your visitor if you have enabled Email Acknowledgment. You can use The Landing Page as a thank you page for your visitors.
Apart from CRM, you can create your own forms, choose from pre-built forms, or integrate with Zoho Forms.
Create A/B testing in Forms
- Click on Create A/B Testing.
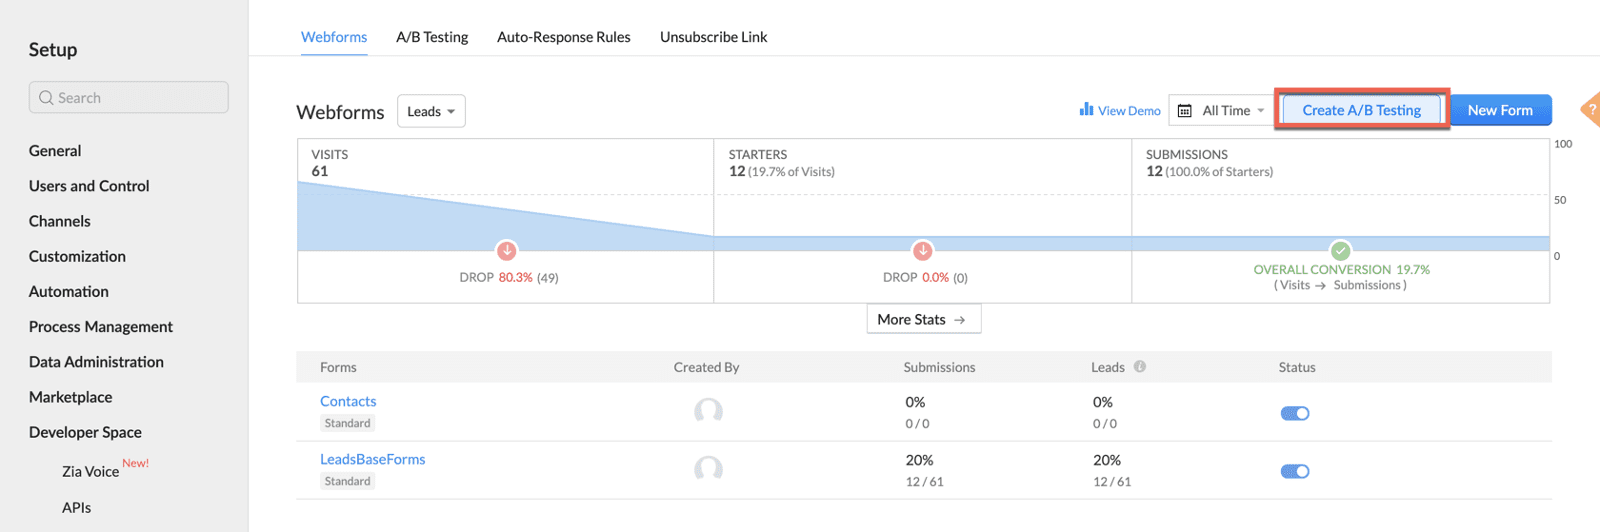
2. Provide A/B Testing Name and select Form Name from the drop-down.
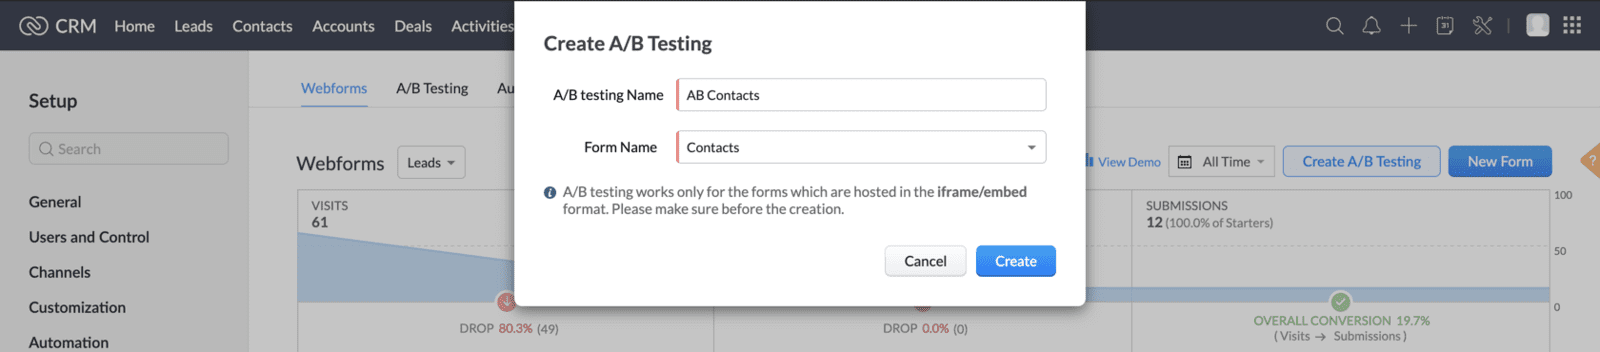
Note: Create a variant of the form to proceed with A/B Testing.
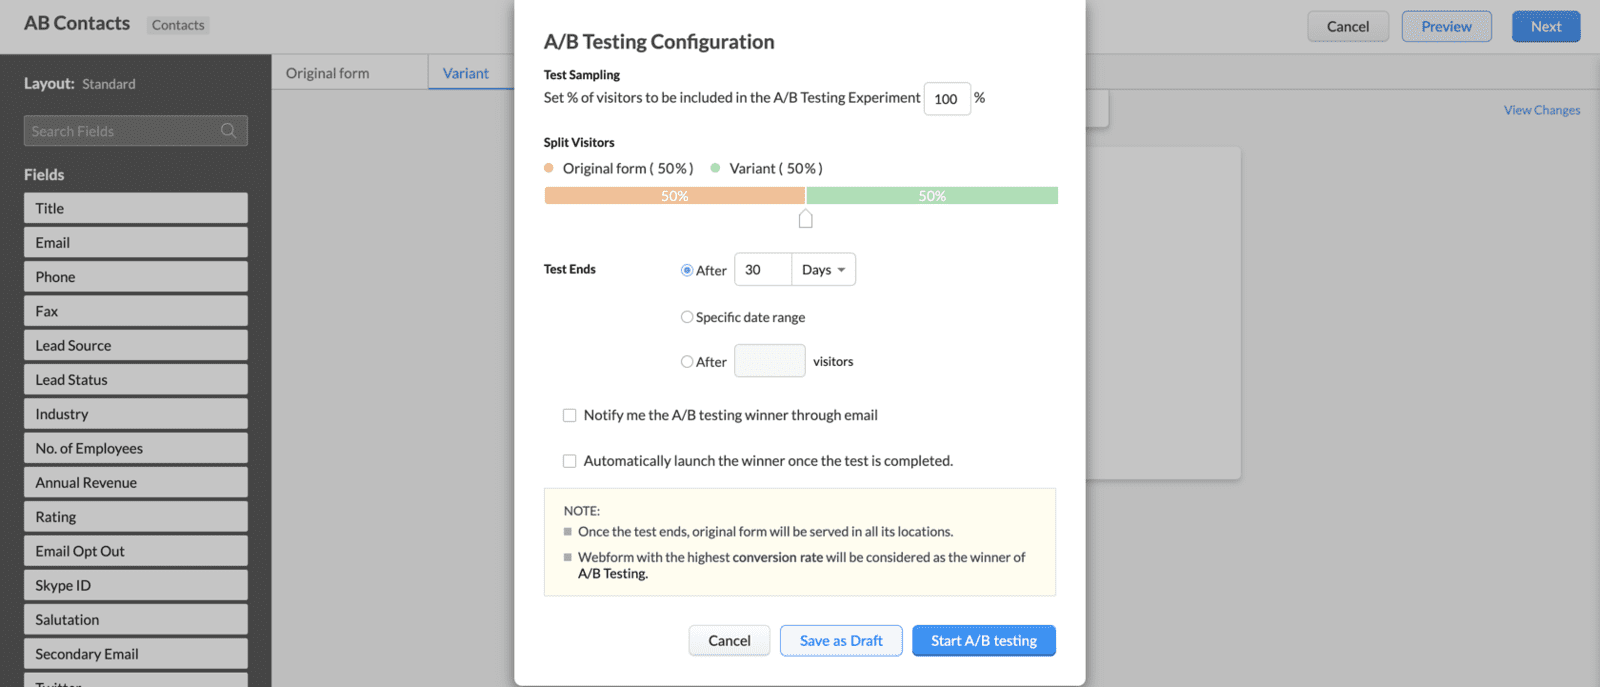
Proceed with the usual A/B testing set up process. You can select the percentage between the original and variant versions of the form.
Click Start A/B Testing.
5. Return to Zoho Sites Builder and Reload the form section on your website builder. Once reloaded you will be able to see only the original version of the form in your builder.
Note: Publish your site to render variant forms based on the percentage assigned. A/B testing is usually carried out for a month with your visitors. Based on the results of the test you can finalize which form needs to be launched on your website.
Launch Specific Rendition of the form
Open A/B Testing tab.
2. Click on View Results.
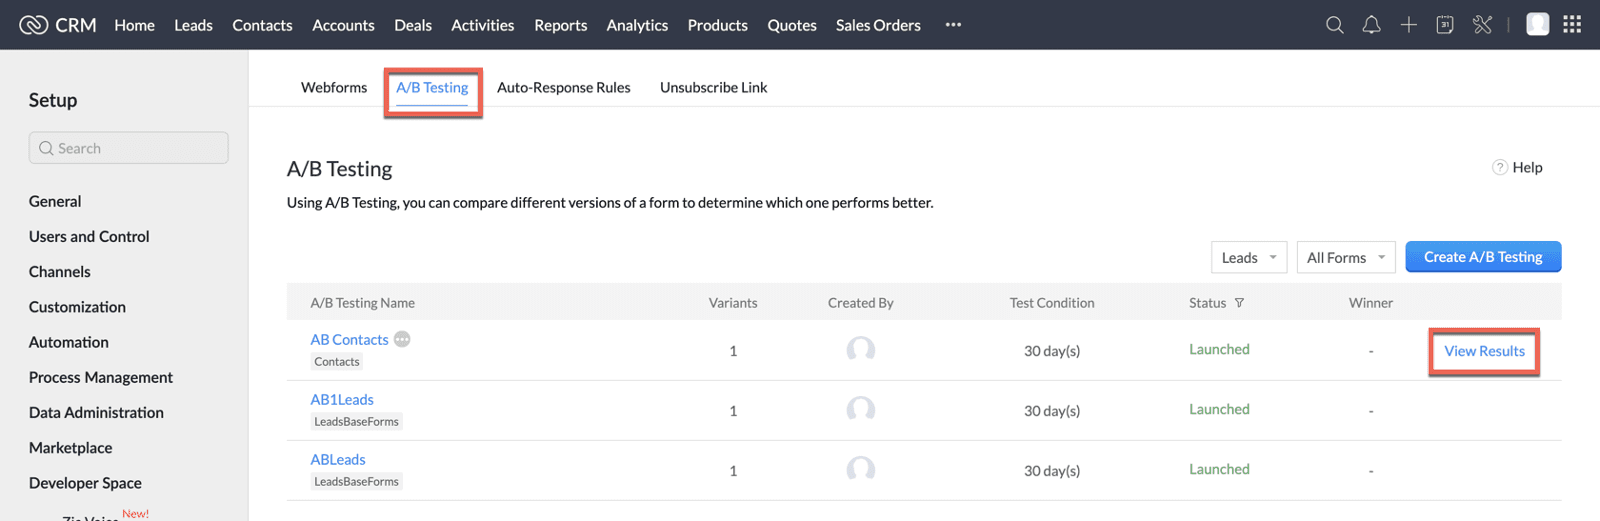
3. Here you can view the results of the testing that happened. After viewing the results you can choose to launch which form you want to include within your website.
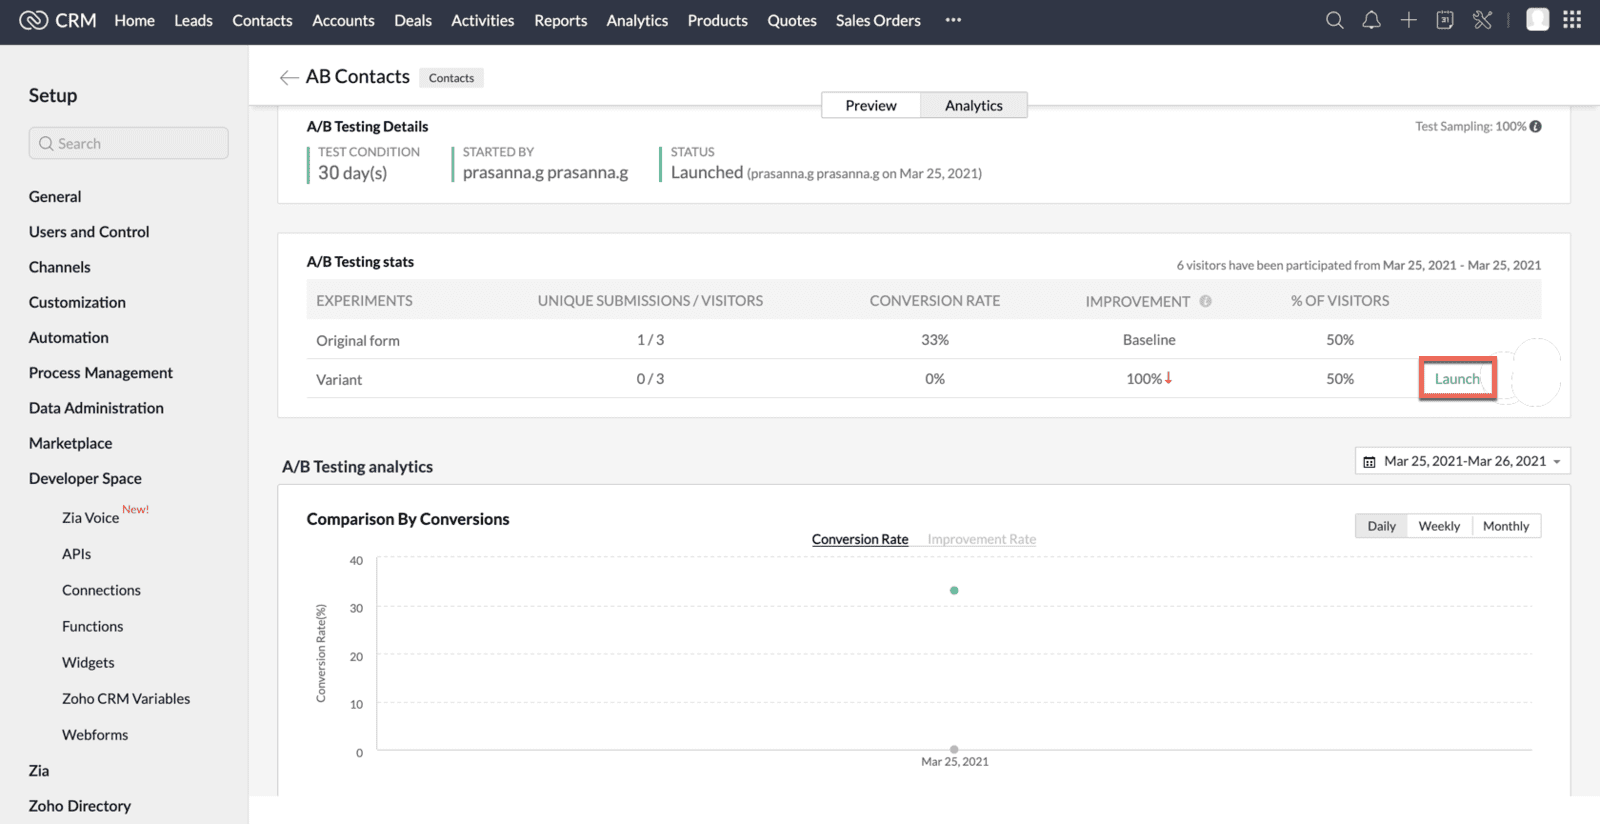
Confirm the form to be launched.

Return to Zoho Sites Builder and Reload the form section on your website builder. Once reloaded you will be able to see the launched version of the form
Note: The published version of your website will reflect the rendered version that was launched In Zoho CRM.
Create a new Form
Note: The help on forms refers to older version. Therefore, features in the help will not match those in the new form builder.
Apart from CRM, you can create your own forms or choose from pre-built forms too.
Create your own form:
- Access the Form menu.
- Click the Create a new Form.
- Click Build your own Form.
- Enter a name for your form and click Create a Form.
- Drag form fields from the menu on the left and drop them in the blank space in the center.
- Modify the field and form properties by switching between the tabs on the right-side.
- Click Back to Site Builder in the top-right corner to apply your form.
Pre-built form
- Access the Form element.
- Click Create a new Form.
- Choose a form from the categories on the left.
- Click Add to apply your form.
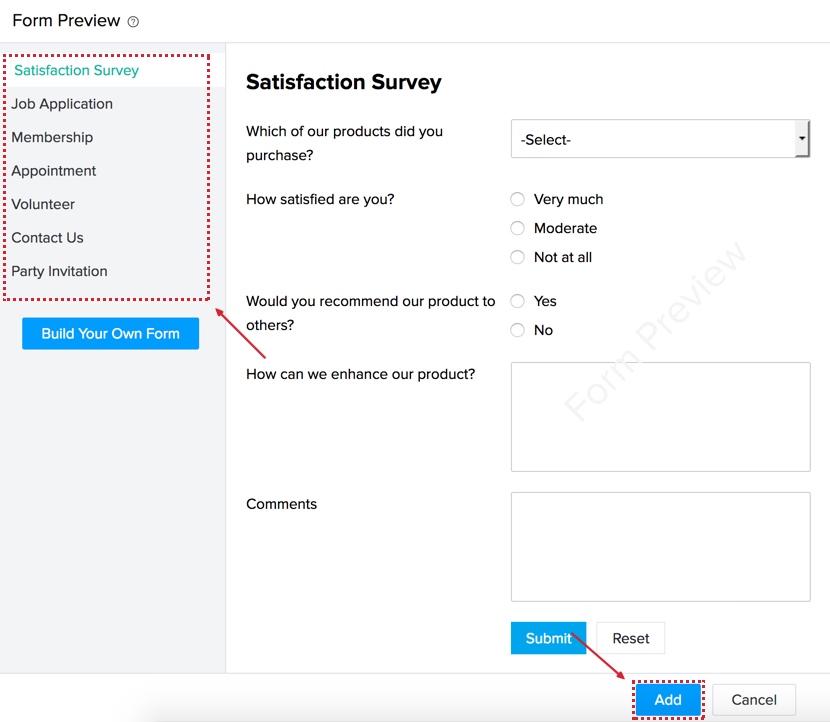
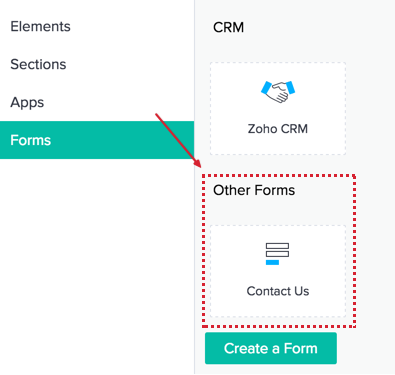
Note: Forms that you create will be listed under the Other Forms menu and you can access them for later use.
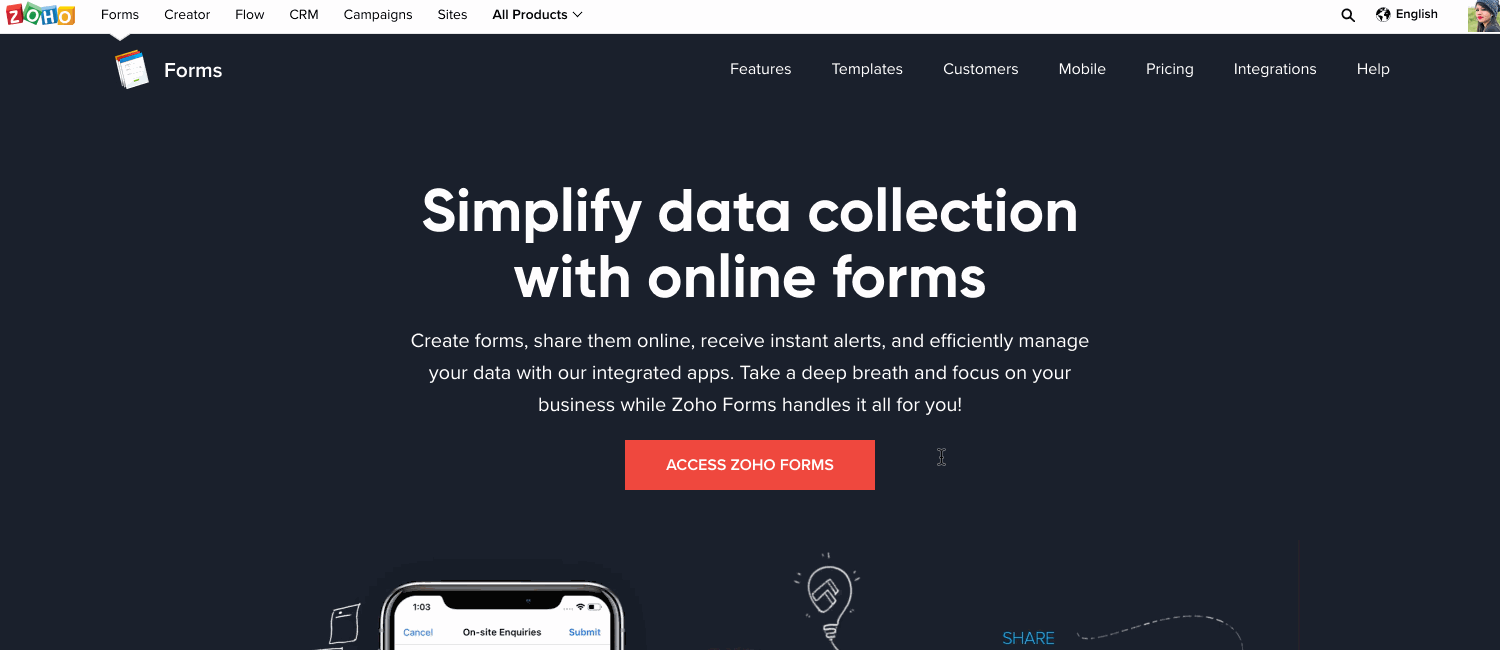
Integrate with Zoho Forms
The Forms which you create on Zoho Forms can be added to you Zoho Sites Website.
To create a form on Zoho Forms:
- Access https://www.zoho.com/forms/
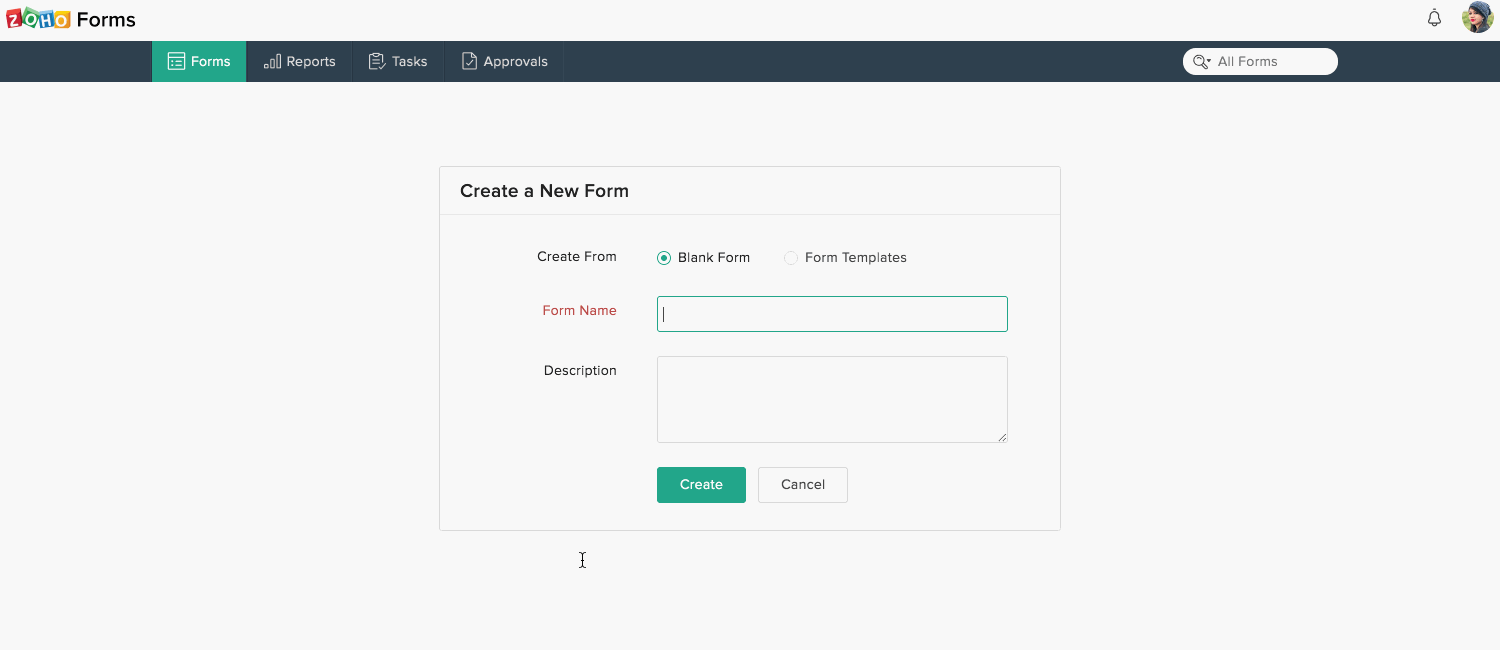
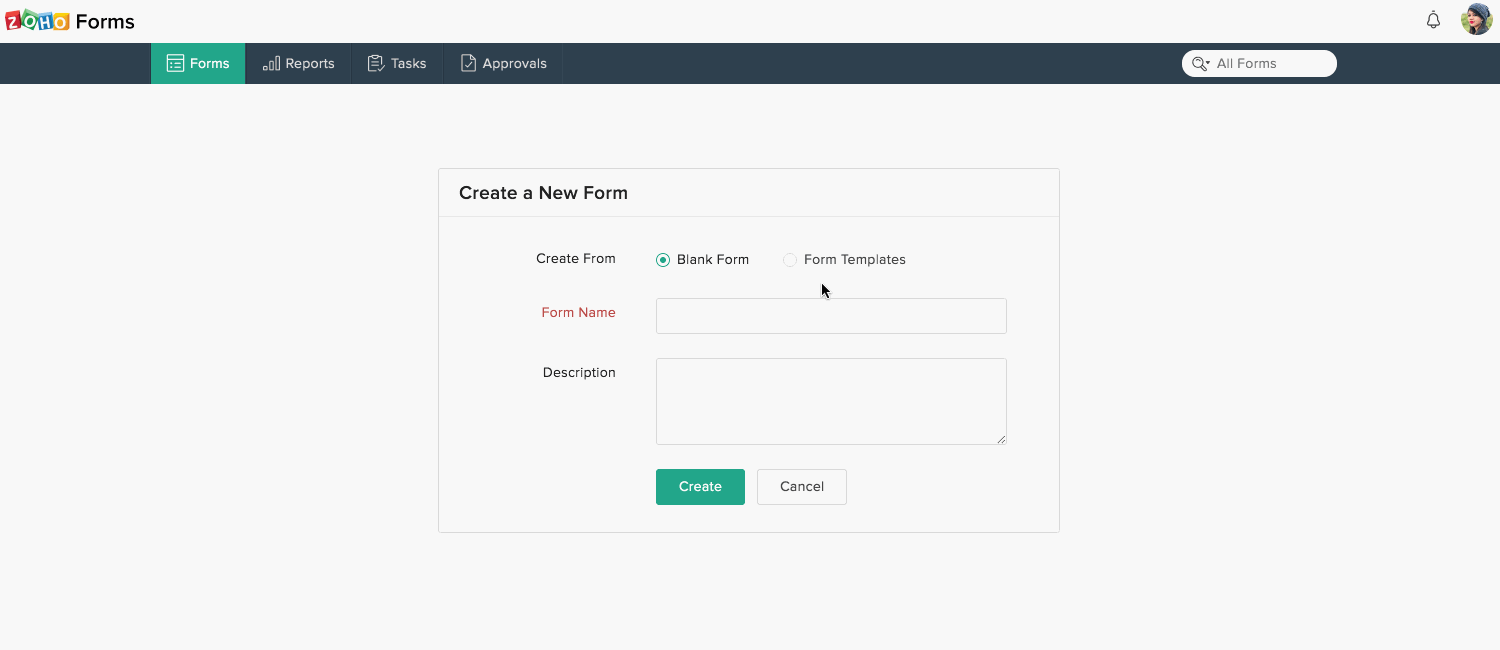
- Click New Form at the top right corner.
- Choose from the Blank Form or Form Templates options.
If you have chosen a Blank Form:
- Enter a name and description for your form.
- Click Create.
- Drag and drop form fields to create your form.
- Click Save.
If you have chosen a Form Template:
- Choose a template from the template library on the left.
- Click Use This Template at the top-right side.
- Add other fields which you require.
- Click Save.
To add a Zoho Form to your builder:
- Access your Formelement.
- Click Zoho Forms.
- Choose the form you would like to add to you website from the Form Preview menu.
- Click Add.

Note:
- Use the Pop-up tool box to exit how your form appears on your page.
- The data from your Zoho Forms will be stored in your Zoho Forms account and can be accessed from there.